
Skydiving Themed Shuffle Puzzle
Back in 2018, a mate and I went on a holiday to the magestical land of New Zealand. While we were enjoying a number of the tourist attractions the south island has to offer, we went skydiving over Wanaka and also visited Puzzling World, which has a bunch of optical illusions, a maze, and - you guessed it - puzzles. One of the wooden puzzles I remember attempting was a shuffle puzzle. It is simple to operate, but hard to master (unless your name is Ben). The idea of the puzzle is to move the large square from the top of the play area to the bottom by sliding the pieces around. So I thought it would be a fun throwback to combine these two experiences into a gift for my friend.
For a while I had thought about making the puzzle, but I didn't think I had the skills or tools I might need to make it, at least to a standard that would make the gift worth keeping, haha. However when I was sourcing some cut to size acrylic sheets for another project I was working on, I found out that they also offered laser cutting. So I thought it might be a good opportunity to try it out a new technique and see how it turned out.
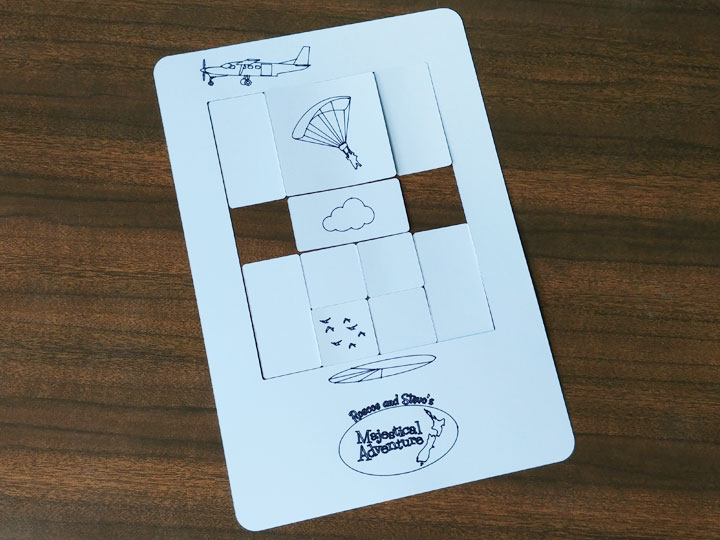
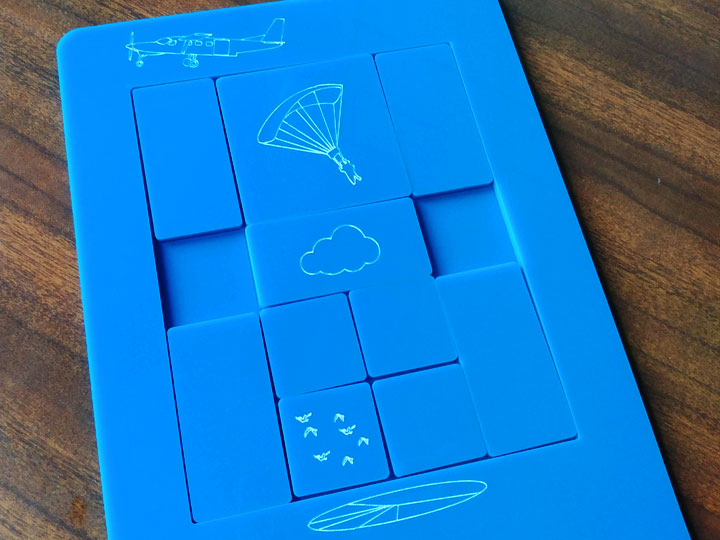
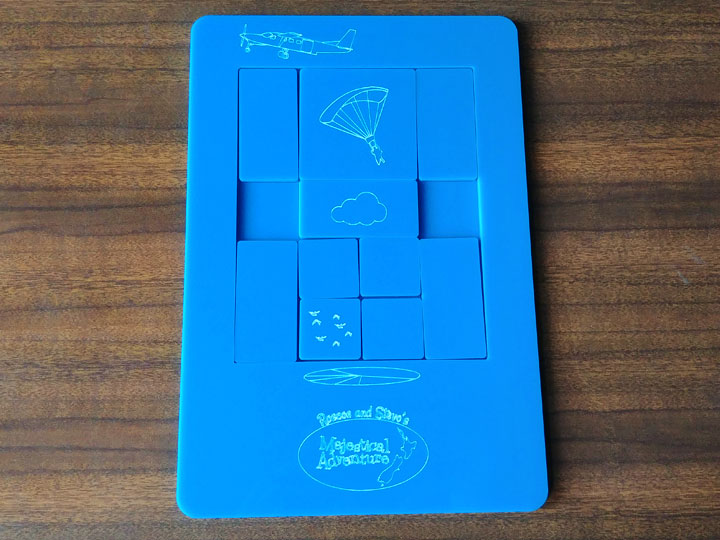
My first step was to draw up the outline of the puzzle. I scaled down the inside shapes slightly to make sure they would slide easily. I illustrated some images which would then be engraved on the acrylic. This was another nod to our holiday, but it also adds a bit of story to the puzzle. Rather than just moving a square from one end to the other, you need to guide the parachutist from just after exiting the plane to safely landing on the ground.
After completing the drawings I created a mock up using my Cricut on just a piece of paper. I used a black fine tip pen to draw the images that would be engraved, and cut out the shapes using the standard fine point blade. This was helpful to check if I was happy with the size of the puzzle, as well as to make sure the file worked properly before sending it off.
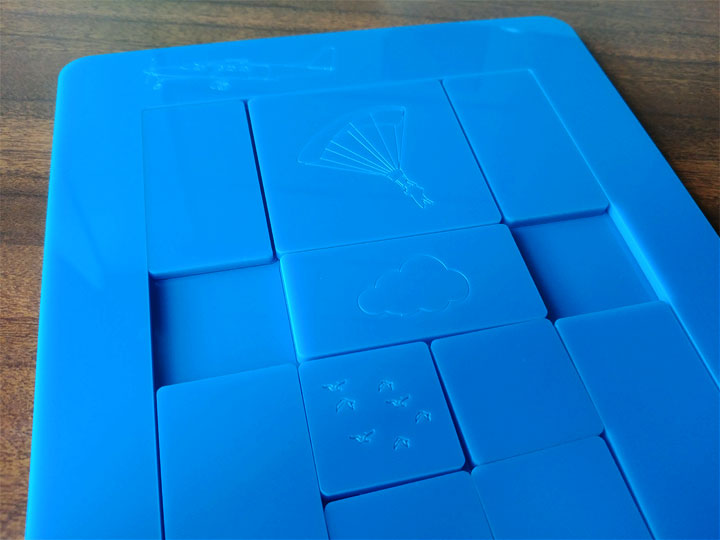
I went for a sky blue colour for the acrylic to look like, well, the sky. This is what it looked like when I first got it. Pretty good so far but the images didn't stand out enough.
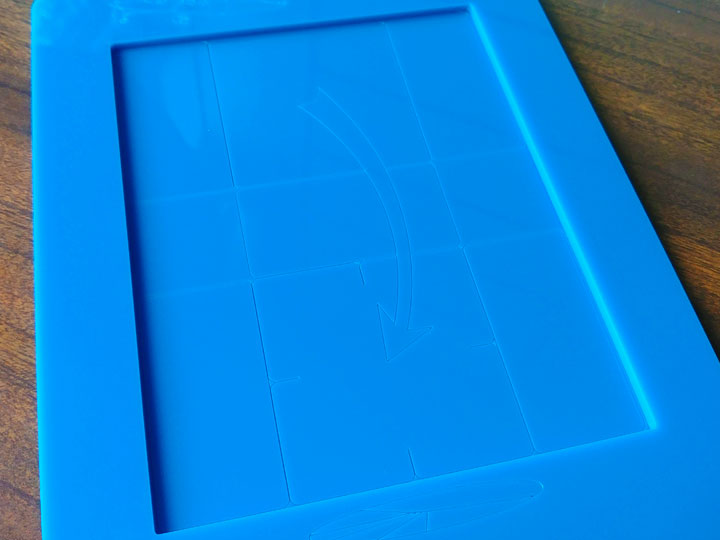
It's worth pointing out at this point that it has two layers. The top layer is made up of an outer frame and the sliding shapes, both of which have images engraved on them. The bottom layer has the frame attached to it, so the shapes can be slid on top of it. I had the bottom layer engraved with basic illustrated instructions so that the puzzle can be reset and to show you what the challenge is if you haven't seen one before or it hasn't been explained to you.
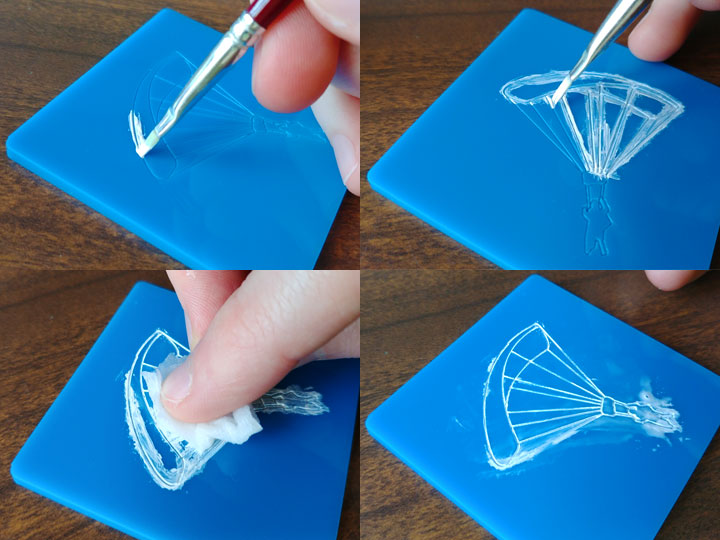
To bring out the images, I applied white acrylic paint over and inside the engraved lines, and then wiped of the excess paint with a moist paper towel. I did this a couple of times in some spots that didn't get enough paint the first time.
Voilà! The paint in the engraved lines really makes the images pop. Getting this project laser cut and engraved really gave this project a much higher level of finish than what I would have been able to achieve with the tools I have at home. It was probably more expensive, but it also saved a lot of time.
The only problem I've noticed with using acrylic is that sliding the pieces of the puzzle does tend to create scratches on the surfaces. I'm not sure whether the same thing would happen with wood or not, but I thought it's worth noting.
Now to try to solve it!